WindowsXP VPN ServerThe following page details the steps necessary to create a WindowsXP VPN Server |
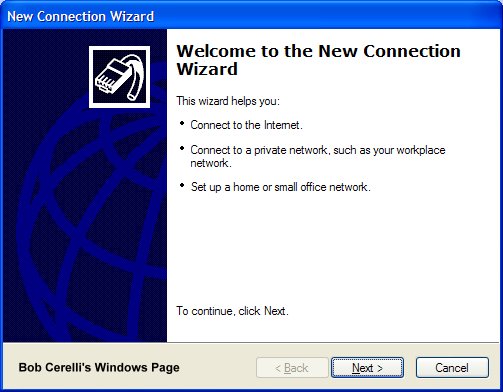
| 1. | Go to Start / Settings / Network Connections |
| 2. | Start the New Connection Wizard |
 |
|
| 3. | Click on the Next button |
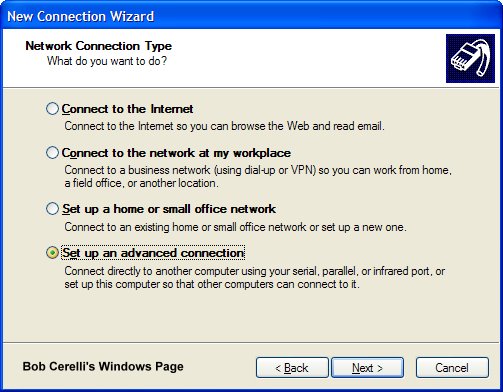
| 4. | Select Set up advanced connection |
 |
|
| 5. | Click on the Next button. |
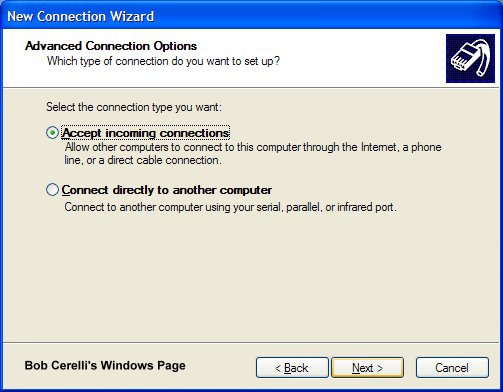
| 6. | Click on Accept incoming connections |
 |
|
| 7. | Click on the Next button |
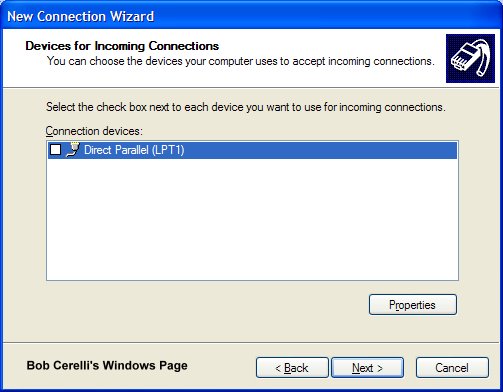
| 8. | At the LPT1 page, skip it and just click on the Next button. |
 |
|
| 9. | Click on Allow virtual private connection |
 |
|
| 10. | Click on the Next button |
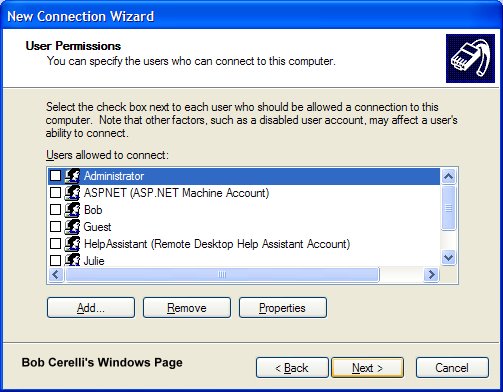
| 11. | Add user accounts that you want to be able to connect to your WindowsXP computer. |
 |
|
| 12. | Click on the Next button. |
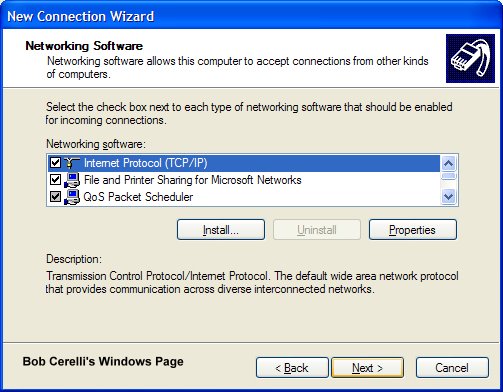
| 13. | Highlight Internet Protocol (TCP/IP) and click on Properties |
 |
|
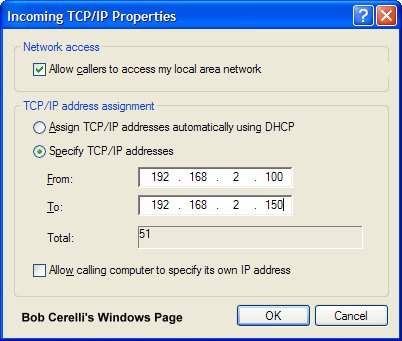
| 14. | Determine how you want the remote computers to get their IP address |
 |
|
| 19. | The above example will assign IP addresses to each client. Make sure the IP scheme is the same as on your server. |
| 20. |
If the VPN server is behind a router, Port Mapping will need to be done on the router. Standard port usage is 1723 & 47 for PPTP. Port usage for IPSec is 500, 50-51. These ports will have to be forwarded to the VPN server's IP |